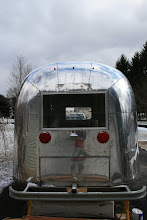


So, where do I begin? So I decided that the only way to restore/upgrade would be to break it down to the frame and start fresh. I have been thinking about taking it back to the original, but it really did not make sense to me since so many upgrades CAN be made. So, it was time to start and I wasted no time at all. I started just a few days after she arrived home. Some told me it looked fine the way it was, but I knew that being 44 years old would require some definite repairs. I started by removing everything, all furniture, appliances, bathroom shower/sink/tub combo, everything….It is now stacked in my basement. It actually turns out to be so much more than you realize. So once everything was removed I removed the sub-floors, which were made of plywood. They were rotted all around the edges and had dirt and all kinds of items in the belly pan. Fiberglass insulation had somewhat disintegrated over the years. The lower sections of the walls were also removed in order to get a good look at the U channels. In a lot of places, there was nothing but a 44-year-old bolt rusted to the frame and shell. No wood between the rusty bolts in some places. The wheel wells were in good shape. The black water tank seemed to be in good shape, but I replaced it as well. I might have upgrade to one that is bigger than necessary, 31 gallons. Oh well, we live and learn and hopefully I wont have to remove it from underneath the bathroom floor. So, once the old plywood was up, I POR-15’d the frame and put a topcoat of sterling silver on top of it all. I later had to have some welding done. I added three cross members near the front, fortified the back cross member, and added supports for the black tank pan. The sub floor is made of Advantech OSB from Coffer Brothers in Tucker, GA. I coated them on both sides with leftover oil-based polyurethane left over from refinishing my hardwood floors 5 years ago. The wheel wells and pan were welded at Complete Metal Fabricators in Tucker, GA as well. They were great and welded nice 18 gauge pan and wells. Both were installed before the sub floors were re-attached to the frame. I also had to put aluminum on top of the frame, below the sub floors where the step enters the trailer. The sub floors were attached with 1 1/2 by 3/8 inch elevator bolts with fanged washers below the head of the screw and a regular washer and nylon lock nut below the floor. I used over 60 bolts to re-attach the floors to cross members and the frame. I did not cut the shape of the trailer until I was ready to reattach it to the trailer. I kind of had to eye it since the old floors were rotten around the edges. As we tried to set it down onto the new sub floors, we had to trim the edges, remove the supports and lower it using two 3-ton floor jacks. Just today I finished attaching the shell and floors to the frame. It now feels more solid than it ever has. I spent the end of the day removing the identity tags, tail lights, and two plastic vent covers. Then I used adhesive remover to remove silicone and old adhesive. Finally, a thick coat of Removeall 220 on the whole exterior skin. Soon, I will bein to compound polish the exterior.

No comments:
Post a Comment