Friday, October 3, 2008
Axle replacement Day 1 (45 minutes)
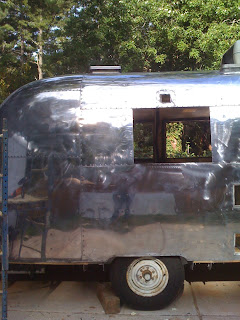
So, I have finally made it t the axle replacement. The axle has actually been here for 3 weeks, the wheels and tires and hubcaps are now complete, so I am ready to move. It is kind of intimidating to do this, but it seems pretty easy now that I have a plan and understand how it works. So...I spent about 45 minutes today preparing the job. Moved the trailer to a flat area, jacked it up and dropped it onto railroad ties and 6 by 6 posts. Removed the lug nuts and began to remove the bolts that hold the axle onto the frame. Tomorrow morning I am going to disconnect the shocks, and then the axle. Here is where it ended up today. Tomorrow, a guy is coming from Loganville to watch and possibly help. He has an airstream and may want to replace is axles as well.
Saturday, September 27, 2008
The shining
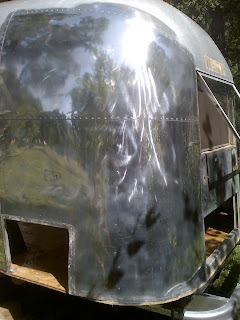
I decided to not install the new axle yet. I simply was not ready to take on that challenge. I decided instead that since the weather is cooler, I could use this time to polish her up real nice using the compounding polish. I also began to shine the door. I have not yet begun to clean up the windows, that is the next part of this renovation. I need to figure out how to seal all the seams from the inside.
Some randomly wonderful tings have happened to me lately. Yesterday, the original owners of my lovely young lady, emailed me. They were pleased to see the effort I was putting into the restoration. I was thrilled t know the parents of this poor little orphan child....Then, today while I was polishing, some neighbors from less than a mile away stopped by to see the project. They have a smaller Caravel from the 50's or something. They were really cool and I intend on haning out with them. He reminded me so much of my uncle tom.
Tonight we are going to see Donna Hopkins at a nice little pizza joint, Shorty's, in Tucker, GA. Check it out. These are ictures of what was accomplished today. I could not quite et the wholte top, but will complete the polishing job tomorrow.
Saturday, September 20, 2008
She finally got naked for me....
Naked Airstream. That is what I finally ended up with. Well, naked in my eyes. I have not given her a name yet, but it is definitely a her.
So I was unable to change out the axle that I ordered from Dexter. I had forgotten that I needed the new wheel and tire. not to mention that steel rims that hold a baby moon, are not something most stores have. So I figured I would do other things, like finish removing the interior skins, remove fiberglass, cut out od wires, and finally remove the door and windows. Now she is naked!!!
It is going to be fun shining the edges and completely re-sealing and glassing the windows. Shining the exterior skins, even in areas that will not be seen. Nice to think about. The sound I remember the most about today was the back of the rivets hitting the interior floor on the inside as I drilled them out from the outside.
So, here are some pics of how she ended up today. I like the one of her from behind...
Sunday, September 14, 2008
Round 1 Polishing/Compounding
Today was such a beautiful day. We spent it by walking up Stone Mountain at 8am and watching the fog burn off and the sun come out. I am realizing that having balance is so important in our lives. Over the past month I have been spending so much time taking the shell off and all that had to take place before we could put it back on. It is so very nice to finally be at a point where it is only going to continue to look better. Polishing really does bring out the scratches in the skins, or maybe it is the leftover polish that I need to wipe off that brings out the scratches in the skins. I am also thinking that I need to go with a tougher rade of polish to get some of the corrosion and scratches off. I might try to get something locally, just to see if it works well. Oh yeah, We had a special fairy come by today to help with the polishing. She's really cute too. The next step will be to finish compounding the top of the trailer and also to remove the interior skins completely in order to re-wire and insulate. More on all of that later, here are the pictures of what took place today.
Saturday, September 13, 2008
Tear it apart and put it back together
So, where do I begin? So I decided that the only way to restore/upgrade would be to break it down to the frame and start fresh. I have been thinking about taking it back to the original, but it really did not make sense to me since so many upgrades CAN be made. So, it was time to start and I wasted no time at all. I started just a few days after she arrived home. Some told me it looked fine the way it was, but I knew that being 44 years old would require some definite repairs. I started by removing everything, all furniture, appliances, bathroom shower/sink/tub combo, everything….It is now stacked in my basement. It actually turns out to be so much more than you realize. So once everything was removed I removed the sub-floors, which were made of plywood. They were rotted all around the edges and had dirt and all kinds of items in the belly pan. Fiberglass insulation had somewhat disintegrated over the years. The lower sections of the walls were also removed in order to get a good look at the U channels. In a lot of places, there was nothing but a 44-year-old bolt rusted to the frame and shell. No wood between the rusty bolts in some places. The wheel wells were in good shape. The black water tank seemed to be in good shape, but I replaced it as well. I might have upgrade to one that is bigger than necessary, 31 gallons. Oh well, we live and learn and hopefully I wont have to remove it from underneath the bathroom floor. So, once the old plywood was up, I POR-15’d the frame and put a topcoat of sterling silver on top of it all. I later had to have some welding done. I added three cross members near the front, fortified the back cross member, and added supports for the black tank pan. The sub floor is made of Advantech OSB from Coffer Brothers in Tucker, GA. I coated them on both sides with leftover oil-based polyurethane left over from refinishing my hardwood floors 5 years ago. The wheel wells and pan were welded at Complete Metal Fabricators in Tucker, GA as well. They were great and welded nice 18 gauge pan and wells. Both were installed before the sub floors were re-attached to the frame. I also had to put aluminum on top of the frame, below the sub floors where the step enters the trailer. The sub floors were attached with 1 1/2 by 3/8 inch elevator bolts with fanged washers below the head of the screw and a regular washer and nylon lock nut below the floor. I used over 60 bolts to re-attach the floors to cross members and the frame. I did not cut the shape of the trailer until I was ready to reattach it to the trailer. I kind of had to eye it since the old floors were rotten around the edges. As we tried to set it down onto the new sub floors, we had to trim the edges, remove the supports and lower it using two 3-ton floor jacks. Just today I finished attaching the shell and floors to the frame. It now feels more solid than it ever has. I spent the end of the day removing the identity tags, tail lights, and two plastic vent covers. Then I used adhesive remover to remove silicone and old adhesive. Finally, a thick coat of Removeall 220 on the whole exterior skin. Soon, I will bein to compound polish the exterior.
Subscribe to:
Posts (Atom)