Sunday, February 15, 2009

Painted finally


So, the day arrived where the interior would become less of a patchwork quilt and more to one consistent color. We applied an epoxy primer 1st, and then a once over with zolatone and then the fun part came with a the air pressure turned down and the splatter portion. It reminds we of a whole lot of white, dark grey and golden sperm swimming on my walls. We did not have enough to completely coat the whole interior, but enough to get the public areas and behind some of the cabinets etc. The guns we were using were top of the line and spupposedly cost about $800 +/- for just the gun. They were what I imained to be professional grade, not DIY grade. I just met the right person at the right time, let me tell you. The whole painting project would not have taken place had I not been contacted by a new Airstream buddy of mine from the outskirts of Atlanta. So, we primed it with an Epoxy grey and then applied a ruby red lamp to help cure the primer. The next step was to spray the zolatone coloring the walls. I did not realize that whenyou turn the pressure on the gun down, that the true effects of zolatone take place, the slatter effect. This is what it is all about friends....So here are some funny pics of our day. I am going to try to post them begining to end in two posts.

The 1st Trip


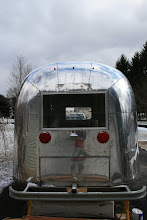
I awoke at 4am and was unable to go back to sleep, So....I decided to get in the truck and hit the road. I did not really realize that this was the 1st trip our trailer has gone on since the floor and everything has been replaced. I did not take into consideration all that has taken place in order to get her to where she was this morning. Even though i drive with trailers in tow alot of the time, this was a new experience, with her in tow and all lite up at 4:30 am on a Sunday heading towards Ohio. She looked Great, even with some left-over polish. I am beining to think that the mirror shine is not going to be for me, or atleast not everytime. I like the black polish residual.....So, I made it through the Appalachian mtns and the Cumberland Gap, Jelico Tennessee and Cincinatti and then through the farmlands of Southern Ohio ending in Newark Ohio, Uncle Tom's.....here are some pics from the trip.

Friday, February 13, 2009

Apollo Grey Zolatone


So, I told you about this friend who has the tools to help paint Zolatone. Well, tomorrow is the day. I spent the evening prepping the interior for a paint job tomorrow, begining at sunrise. I can't beleive the day has come to re-surface the interior color. For 5 months is has been a mixture of latex paint over the original Apollo Grey, and tomorrow it will have a 2009 version of Apollo Grey. Here are some bad pictures of the prepped area. I will take better pictures tomorrow, but for tonight, here they are.

The day has come


So yesterday I bean to reclaim my basement. For the past 5 months the original interior cabinets and stuff from the Airstream have made themselves at home. They took up about 300 square feet of pspace and also smelled like they were 44 years old. Here are pictures of everything in my back yard. the reason for the removal from the basement is because on Sunday, February 15th, I will be taking the Airstream on its first road trip with me. I am making the trip to Newark, Ohio to my Uncle Tom's place. he is a very talented woodsman and has offered his skills to help me reinvent the interior cabinetry and gauchos. I will show more as the project and trip takes place, but these ics are of what will go inside of her. This will be the last time she (un-named female Globetrotter) will spend any time with this old cabinetry. I think a bon fire is in the future.....

Tuesday, February 10, 2009

MARCUS, thanks for your ideas and info you post on airforums. I have alot of my ideas from your posts. Just had to give you props, Andrew

Water lines begin


Once the heater was installed, the next step was to decide what type of lines to run. I decided that after all was said and done, 1/2 PEX piping crimped was the way to go, atleast for 90% of the lines. I spent the $130 for the PEX crimping tool, 2 rolls of red and blue lines, and numerous t's, l's, and some solder ends. I also decided that I would not cut another hole in the side of the trailer and create a city water inlet behind the street-side wheel well. I created the inlet from copper pipes and ran it through the floor coming into the trailer next to the hotwater heater. I used a regular household pressure regulator. I also decided to not use the hot water heater bypass that I purchased and created one with the hose and attachments I already had. I also installed a water spicket behind the curbside wheel well for exterior water usage. I also ran a copper line that will go end up near the toilet and create a hose bib for washing the toilet out after usage. Here is what it all looks like now. I am waiting to run the lines around the edges because this weekend a friend and I are going to paint the interior skins with Zolatone (Apollo Grey). Once that is completed, I will run the lines and get the trailer ready for cabinets.

Water System begins


So, the Atwood electric ignition hot water heater arrived along with the hot water bypass, a blow-out attachment, some more grey POR-15. I originally planned on using the existing electric hot water heater, but it only runs on 110 volts, which will not serve me well when I am in the middle of no-where woods. So I decided to go with the LP gas electric ignition Atwood. Runs on 12 volts and LP as. So I measured the cutout and used a hand-held grinder with a metal cutting wheel on it to cut out the area. Once that was cut out I had to re-frame the opening and put new interior sheething around the inside of the opening. Once this was completed, I put the heater in place and added (2) 2 x 4's and some advantech wood to support the bottom of the hotwater heater from inside. Next I used metal screws and Trempro635 to attach the heater and seal around the interior and exterior. I then finally cut some strips of aluminum and strapped the heater around the breack and over the top to the walls and floor respectively. Since the access door of the heater is white, I took it to a metal fabrication shop to have a cover for the existing door made. It will have a 1/2 inch lip around the edges so that I can rivet the door to the side of the trailer, creating a good seal. The trailer is curved so it needs to be attached with rivets or other fasteners. I am thinking it would be best to attach it using some other sort of fasterner, something that does not require a drill to open. We'll see.