So I have not posted in while. I have been payin down debt and getting my finances in line with my goals. It did not help that I had a useless axle that I installed a while back. the problem was that it did not provide the ground clearance that I explained I wanted. Upon more research, I realized that it was completely not what I wanted. I will spare everyone the details....but basically I had zero degrees on my torsion arm and a low profile bracket, giving me 4 inches from the ground to the bottom of my grey water tank pan. I was thinking that I was going to have a finger pointed back at me, especially since I ordered it. It would be so easy to say that it was my fault. So I called Dexter Axle and spoke with Connie who listened to my comlaint, she put me in touch with Christine who is the enineer person and then Rick called me back to solve the problem. I simply figured that I would change my order completely and would need to go with leaf springs to raise the trailer. I was dreading the install of leaf springs with all the arts, the welding, more $$$$$ that I had not budgeted for. So Rick ran, Prospec, which takes all of my details and goals and puts it into the Dexter Axle system and let me know if my goals are realistic and what it would take to reach them. Rick talked me back into the torsion axle. I wanted to have enough clearance in order to possibly cross a creek or go onto the beach or to basically take this trailer to places that thers won't be able to. I wanted around 16 inches from the bottom of my grey tank pan to the ground when fully loaded. My brakes and drums were OK, so Rick simply changed my spindle to have a 45 degree angle down torsion arm coupled with a high profile, 3 inch tall brackets. Rick took my Monday and turned it completely around and not only allowed my goal to be reached, but also my budget. he would send me the spindle at no charge and expedite the order UPS directly to my house.
So this all took place on Monday. I checked with Connie on Thursday and she mentioned it should be here in Atlanta by the following Monday. So.....today is Saturday, I woke up at 5am, got some coffee at 6 am, and left to bein my day at home Depot at 7am. Before I could get out of my driveway, the sun was coming up and I saw something on my front stairs. It was the axle!!!!! I had planned on prepping the interior walls for the painting of Zolatone (Apollo grey) as well as install wheel well covers and also prepare for the axle to arrive. So plans changed quickly and I got into installation mode. I had only looked at the instructions the night before, so at the very least I would et the trailer jacked up, tires and old un-useable axle off. At 7:30 I started, by 8am I had the wheels off and one hub and brake off. By 8:30 I was done with hubs and brakes and the axle was completely off by 9:30. I was surprising myself. By 10am the new axle was in place under the trailer and I began t drill the holes. By 11am the brakes and hubs were on the new axle and by 11:30 the axle install and change-out was completed!!!!!! What a day it has been.
None of this would have taken place had it not been for Connie, Chrstine and Rick at Dexter Axle. Their product was mis-represented by a local company who made a mistake. Dexter stepped in and corrected it without pointing the finger at me. They made it right and have gained a customer for life. It is customer service like this that sets a company apart, an American company. During times like we are facing right now, that says alot, and I hope everyone that reads this remembers this situation I had when they order an axle for their airstream.
THANK YOU DEXTER AXLE.
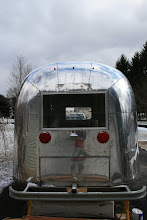
The pictures of the install are next post